


First steps
Purpose of this module
In this module, we will create the project to be used throughout the tutorial, and get to know the Q Studio user interface.
Create the project
Start Q Studio.
To create a new project, click
 New: the project templates window opens.
Select Main project: this project is prepared with the typical elements useful for the design of an HMI application.
Set the project name, for example MyProject, and the path in which to create it.
Click OK: the project is created in the set path, inside a folder with the same name.
Get to know the Q Studio interface
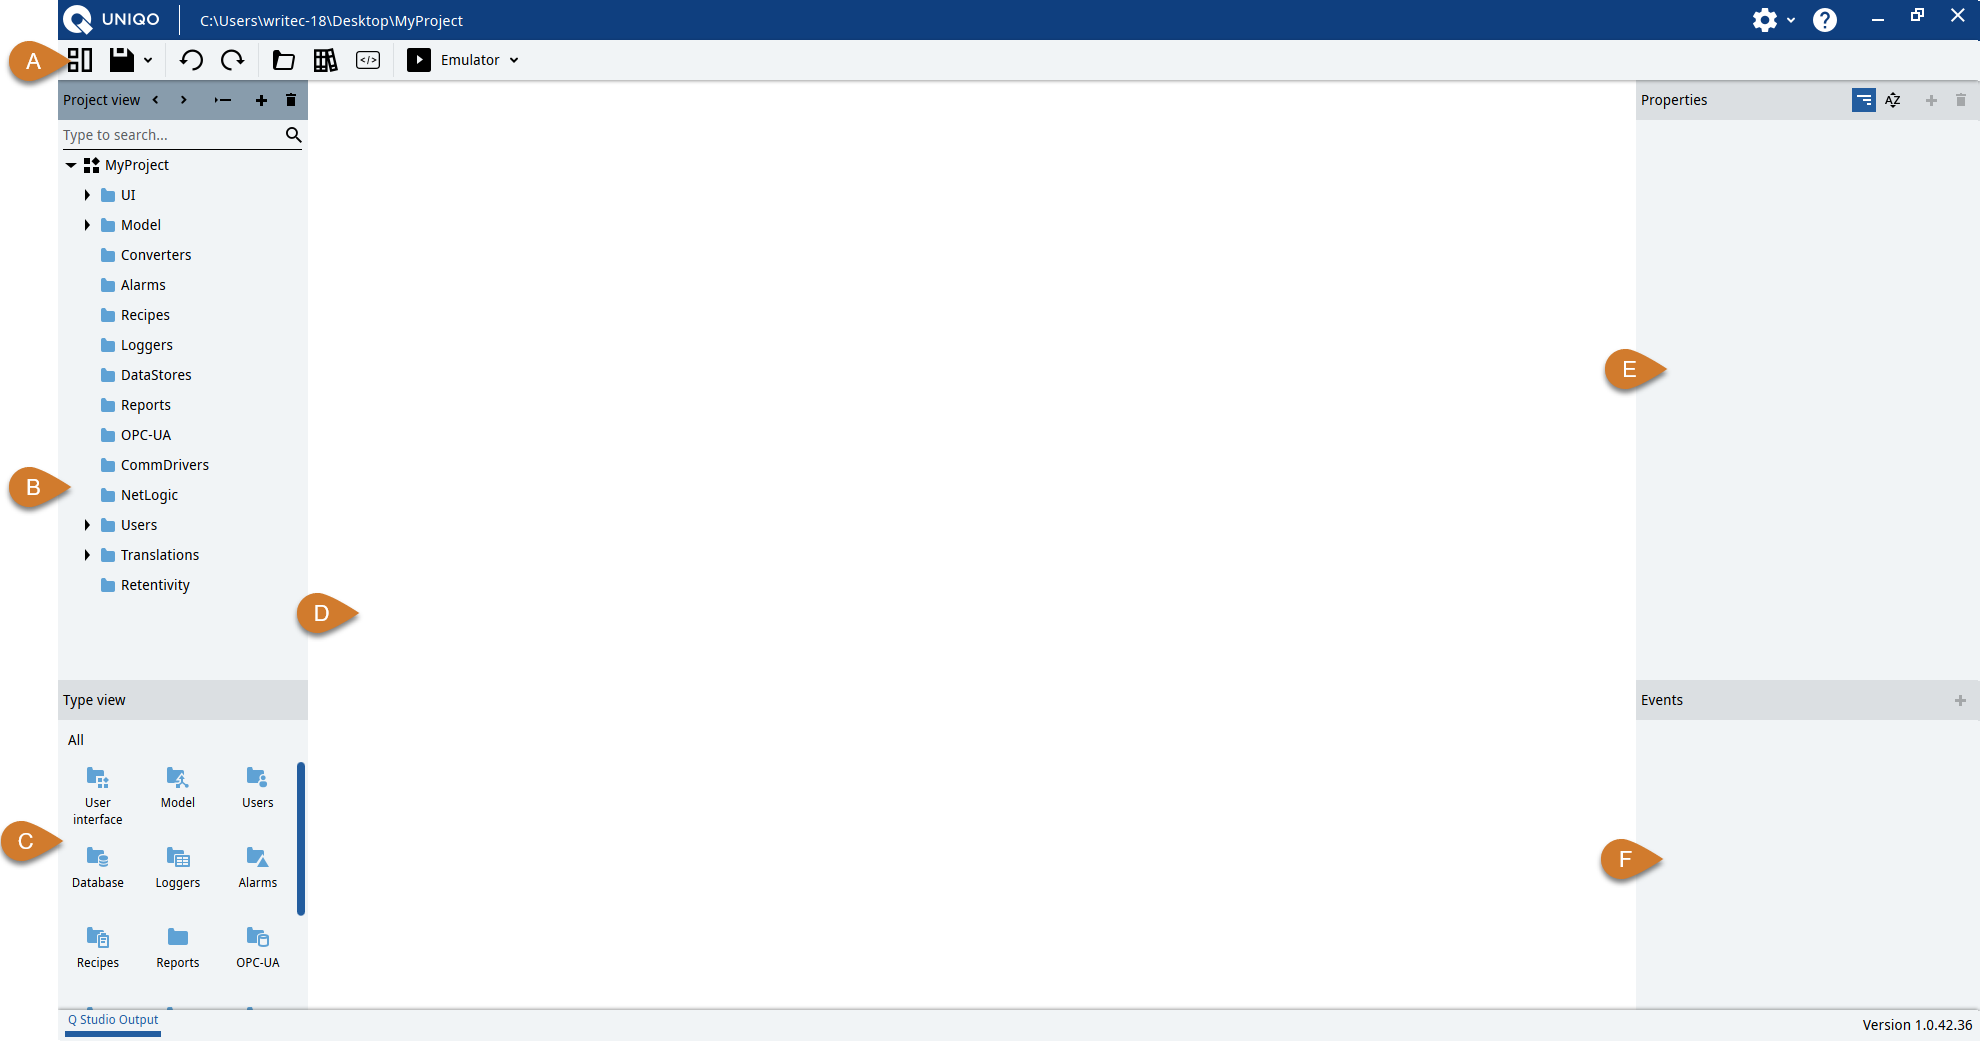
Part
Description
A
Main toolbar
B
Project] panel: project elements/features, organized in folders
C
Types panel: objects and variables from which to derive other objects and variables
D
Object Editor
E
Properties panel of the element of the selected project
F
Events panel: events and associated commands of the selected object
Below is the description of some buttons in the main toolbar:
Button
Function

Create, open or close a project.

Save the project or export the Q Application.

Cancel the last operation.

Repeat the last operation.

Open the project resource window for displaying, importing or deleting project files such as images, videos, documents, certificates, etc.

Open the object libraries and template variables window.

Open the .NET project integrated in the UNIQO project, to integrate functionality through C# code.

Compile, transfer and run the application on the target.

End the Q Application on the target.

Open the Q Studio general settings window.

Open the UNIQO local manual in the browser.
Get to know the section dedicated to graphical elements
In the Project panel, the UI folder is the folder dedicated to graphical elements and the general appearance of the HMI application. The template project we started from includes the following objects:
DefaultStyleSheet: style sheet with the global formatting properties of the various project elements (colors, fonts, borders, margins, etc.)
NativePresentationEngine: object with which to set, among other things, the start window of the HMI application at runtime (Start window) and the style sheet to use (Style sheet).
MainWindow (type): main window, that is the basic element that contains all the graphical elements of the HMI application.
In addition to these objects, inside the UI folder we will create the different graphical elements to be displayed (navigation menu, pages, switches, etc.).

