


Add a recipes editor
Purpose of this module
In this module, we will create and configure a set of objects useful for managing a recipe:
database in which to store the recipes data at runtime
a Recipe Schema object in which to define the set of variables or ingredients of the recipe
a graphical widget (Recipes Editor) to enable the user to manage recipes at runtime
This is the final result:
Create the database for the recipes
In Project, right-click DataStores, then click New > Embedded Database: EmbeddedDatabase1 appears.
- Rename EmbeddedDatabase1 to RecipeDB.
Note
multiple databases used to store different data can exist in the same project. This allows for better project readability.
Create and set the Recipe Schema object
In the Recipe Schema object, we will set up the set of PLC variables that make up the recipe and the database in which to store recipes at runtime. We will configure the object:
Right-click Recipes, then click New > Recipe Schema: RecipeSchema1 appears.
Rename RecipeSchema1 to MyRecipe.
- Click MyRecipe, in the Destination node property set a dynamic link with PLC_PRG. Alternatively, from Project drag PLC_PRG onto the Destination node value. In this way, from the MyRecipe object the variables that make up the recipe can be selected from those imported from the PLC.
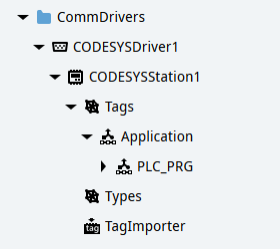
Double-click MyRecipe: the editor to select the variables of interest opens.
Select the variables Ingredient01, Ingredient02 and Ingredient03 and click Apply: the variables synchronized are the recipe ingredients.
Note
if the selected PLC variables are changed, this step must be repeated to display the changes in the MyRecipe object.
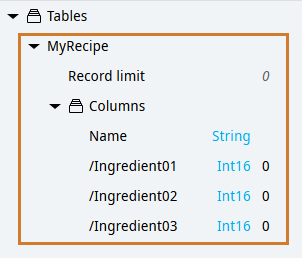
In the Store property of MyRecipe, set a dynamic link with RecipeDB: in RecipeDB a MyRecipe table with three columns is automatically configured, one for each recipe variable.
Configure the widget to manage the recipes
The Recipes Editor widget makes it possible to display the recipe ingredients at runtime and to set the values of the variables, to store/modify different recipes, and to load the desired recipe on the PLC. We will configure the widget:
To add the widget, click
 : the template library opens.
In Widgets, select Recipes Editor and drag it into Page4 (type): the RecipesEditor1 object appears in the panel.
Close the template library.
To link the widget to the recipe, click RecipesEditor1 and in its RecipeSchema property set a dynamic link with MyRecipe.
For the widget to show the recipe variables inside RecipesEditor1, right-click RecipesEditorUISetup, then select Execute Setup: the ingredients in the widget update.
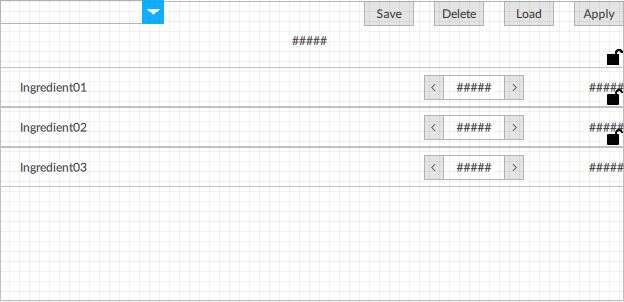
Below is the description of the widget buttons:
Button
Function
Save
Store the recipe in the database during editing.
Delete
Delete the selected recipe from the database.
Load
Load the recipe values from the PLC to the HMI application.
Apply
Apply the selected recipe on the PLC.
Check the operation at runtime
Click
 Emulator and wait for the runtime window to appear.
Click Page4 to display the recipe widgets.
Store a new recipe
Edit the value of the ingredients.
In the combo box, enter a name for the recipe and press ENTER.
Click Save: the recipe is stored in the database.
Repeat the previous three steps for each recipe to save.
Apply a recipe on the PLC
Select the desired recipe: the values of the recipe ingredients are displayed.
Click Apply: the recipe is applied and in the right column the widget displays the values of the ingredients loaded on the PLC.
To change the values of the ingredients on the PLC, change the values in the spin box and click Apply: the values of the ingredients on the PLC are updated in the right column.
